How to White Wash Fireplace Brick Like a Professional

By Terri O’Sullivan April 21, 2020
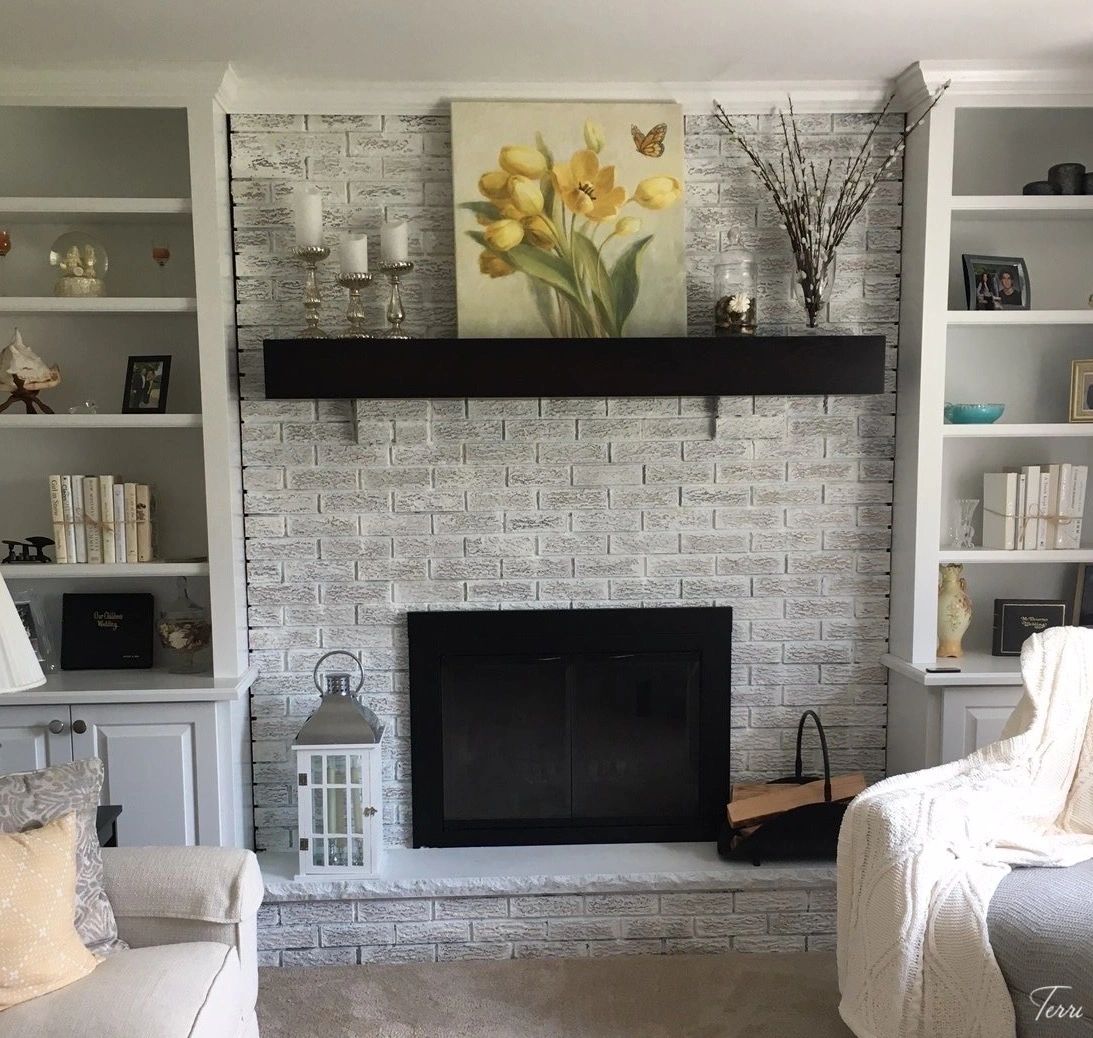
A Whitewash Finish on a Fireplace Brick with brighter grout spilled over surrounding brick.
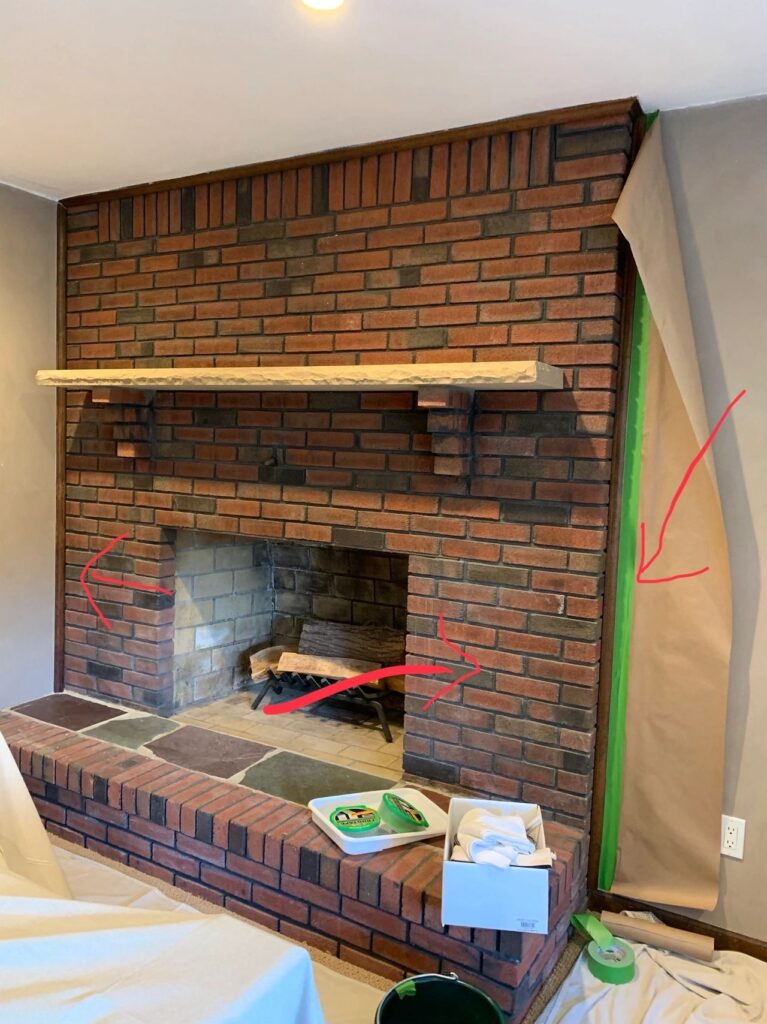
First Things First, Prepare your space for any paint accidents that might happen!
Prep:Extend paper or plastic to protect your walls.
Whether you are whitewashing a fireplace for yourself or a client, you want a professional finish regardless.
Put down drop cloths to protect your floors, tape up the ceiling and sides of the fireplace. Cover up any nearby furniture.
TIP: from the side of the fireplace extend paper 6 inches to protect your wall.

“White Wash” means washing a paint mixed with water. So when washing the mixture onto the bricks keep your walls protected from splatter. (trust me I learned the hard way.)
Note: all stone is different for absorption, these guidelines are guesstimates..
Step 1) In a quart-size container mix 1/4 water into 3/4 of “white acrylic bonding primer”.
Tip: Never over dilute primer. It defeats its purpose.
Tip: the amount of water will determine the coverage of the brick.
- Brighter Finish: (less water) • Darker finish (more water)
Note: Keep an absorbent towel or rag with you at all times to blot any excess or dripping paint.
Step 2) Using a four-inch medium soft brush apply the “white bonding primer” over the brick in a circular motion as well as back and forth to deposit the paint into the crevices of the brick. Let it wash right into the grout.
Grout: With a two or four-inch angled brush, brush in long strides side to side following the lines of the grout.
Step 3) In a quart-size container mix 1/2 water into 1/2 of a ”cool” white acrylic enamel paint. (meaning no red or yellow-based paint that will discolor your brick).
Repeat application from Step 2.
Note: Go over the Grout line one last time at the end with a clean line and heavier paint application. The contrast of the grout line and the bricks gives the fireplace definition. Be sure to soften any paint that spilled over onto brick with a soft towel or rag.
Refresh the Hearth: With a paint that matches in color or lighter to the original hearth. Mix 1/2 with water. With a four-inch brush wash over in long straight strides across the flat hearth and sides. Seal with a polyurethane finish.
What you need:
Drop Cloths (to protect your floors)
Tape and paper or plastic (to protect walls)
Two quart-sized plastic cups to mix paint.
Two and four-inch acrylic paintbrushes. (If it is a bigger space I prefer a big stain brush. It holds more water so the paint stroke is more consistent and its bristles are thin and can get into small crevices.)
Two and four-inch “angled” acrylic paintbrushes.(This is to fit in between brick for painting grout lines.)
A quart of (bonding) primer.
A quart of White acrylic enamel paint.
A quart of acrylic paint to match hearth.
Hope your Project comes out Amazing!!!
View a gallery of Fireplace and Home Design Images and Ideas At:


